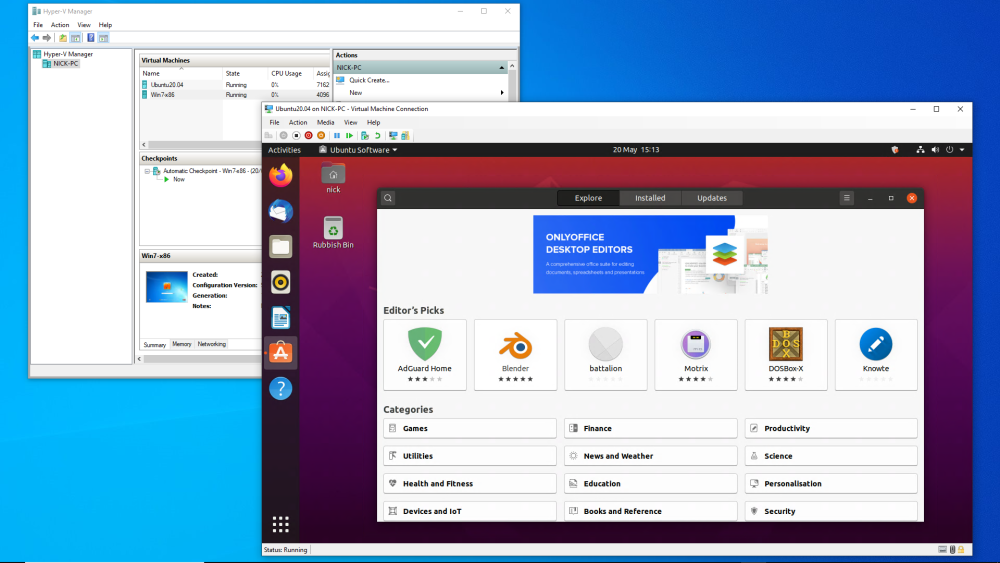
Hyper-V is Windows’ built-in virtualization technology, hard-wired into Windows 10 Professional to allow you to easily run multiple operating systems on a single PC. You can use it to resurrect old programs and hardware no longer compatible with Windows 10, explore alternative operating systems such as Ubuntu or use it as a test environment.
"But I can do all this for free with VirtualBox!" you’ll say. And you’d be correct – to a degree. There’s one critical reason why Hyper-V is a better option than VirtualBox, and that’s raw performance. VirtualBox is a software emulator, which means that it sits on top of Windows and can never match native performance, whatever tweaks you perform.

Hyper-V on the other hand provides hardware emulation, bypassing the Windows layer to provide faster performance. That said, it doesn’t give you direct access to all your computer’s underlying hardware – you can’t directly tap into the computer’s GPU to improve gaming performance, for example. Nevertheless, you’ll enjoy much better performance with Hyper-V over software-based emulators.
Each virtual machine can be configured the way you want it, plus thanks to the use of 'Checkpoints', you can save a virtual machine’s current status, experiment and then roll back your changes quickly and easily, just like you would with any other virtualization tool.
Pre-requisites
First and foremost you need Windows 10 Professional Edition - available now for just $39.99/£39.99 - as Hyper-V isn't present in Windows 10 Home Edition.
Second, you'll need a 64-bit processor, which should cover most modern AMD and Intel chips, but you can quickly check this is the case by opening a Command Prompt and typing ‘Systeminfo.exe’. Check the ‘Hyper-V Requirements’ section at the bottom, which will confirm whether or not you’ll be able to use Hyper-V.
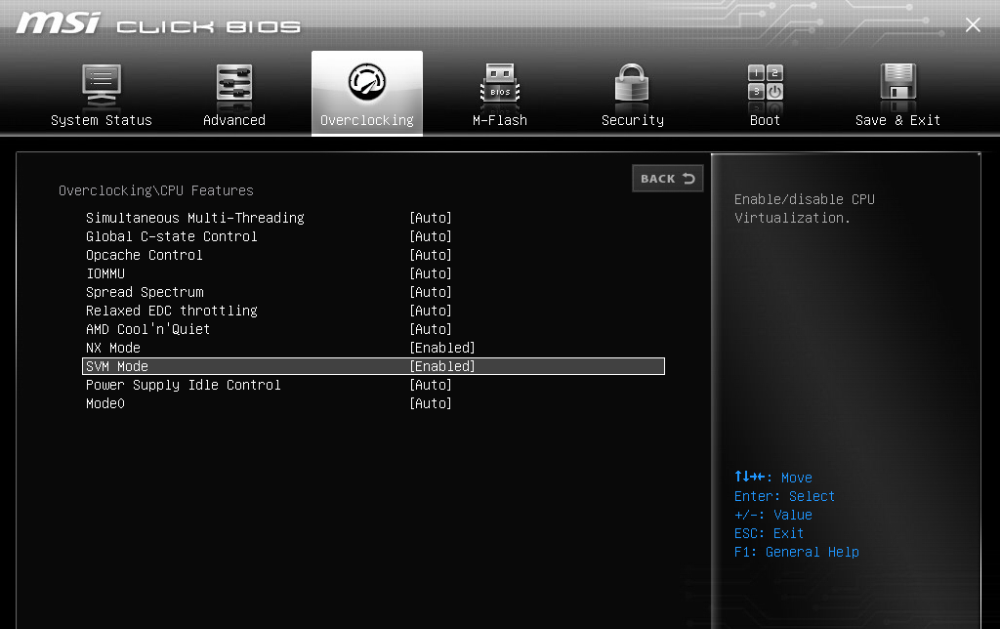
Even if your processor passes muster, you’ll need to have virtualization support switched on in the BIOS – most ship with this feature disabled, so consult your PC or motherboard manual to find the feature (look for Intel VT or AMD SMV settings). Once enabled, you can enable Hyper-V on your Windows 10 Pro machine by typing 'features' into the search box on the taskbar and click ‘Turn Windows features on or off’, scroll down and tick the 'Hyper-V' box. Click OK and reboot if prompted.

Get set up
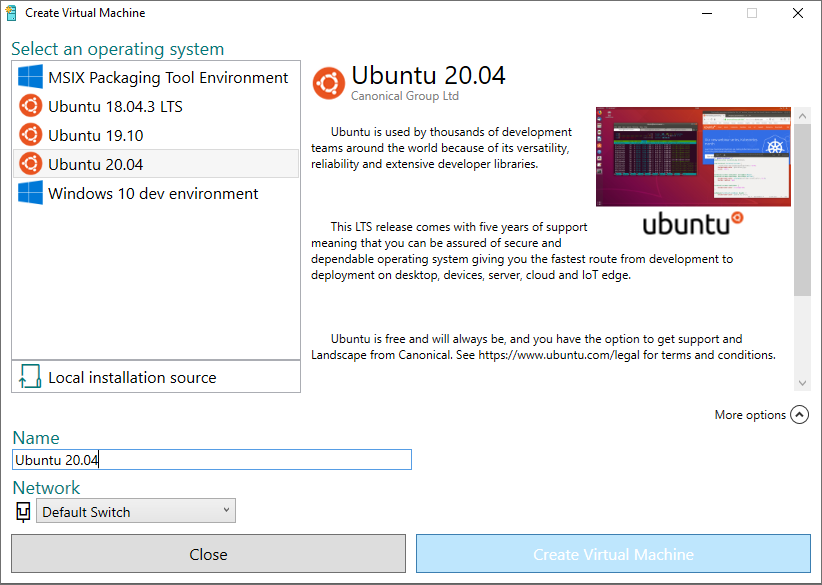
Now type 'Hyper-V' into the Search box and choose 'Hyper-V Quick Create' to set up your first virtual machine. You’ll see pre-selected machines for various flavours of Ubuntu as well as a 'Windows 10 dev environment'. Click 'Local installation source' to choose a different OS.
The Quick Create tool works best with those pre-selected machines; if you want to run an older version of Windows or non-listed version of Linux, you’re better launching 'Action > New > Virtual Machine' wizard from the main Hyper-V Manager tool – do this to make the all-important distinction between a Generation 1 (older OSes) and Generation 2 VM.
From here simply attach installation media (either a physical disc or virtual ISO image) and boot your virtual machine to set things up.
To find out more about how Hyper-V works – including key differences to other virtualization technologies – read Microsoft’s official documentation.

Upgrade to Windows 10 Pro and save!
Ordinarily, upgrading from Windows 10 Home to Windows 10 Pro (never mind from an earlier version of Windows) is prohibitively expensive. But we’ve got a great deal for you: get a Windows 10 Pro license key for one PC for just $39.99/£39.99, saving you 80% on the MSRP.
You can use the key on a fresh install of Windows 10 Pro, or upgrade your existing (and fully activated) version of Windows 10 Home without having to reinstall Windows, preserving all your files and programs. To do this, navigate to Start > Settings > Update & Security to ensure Windows 10 is fully updated, then select Activation in the left-hand pane and click 'Change product key' to enter your new product key and unlock all the great features in Windows 10 Pro.


Your Comments & Opinion